
Happy New Year! Here's hoping 2012 is kind to us. So in honour of the new year I am going to show you how to create some 2012 balloons using the 3d and mapping tools in Adobe Illustrator. Here's what we'll be making. (I'm assuming knowledge of the pen tool and some other basics of Illustrator)

STEP 1
Open up a new document in Illustrator. I'm using AI CS3 on a PC and I used the default settings as below:

STEP 2
Choose a nice bright fill colour (I used #F7931E) with no outline and using the ellipse tool draw a circle - it doesn't have to be perfect. (handy tip - if you do need a perfect circle or square any time hold down the shift key while drawing and it will keep the proportions equal)

STEP 3
Using the 'convert anchor point tool' select the bottom anchor point. One click on the point will convert the curve to an angle:
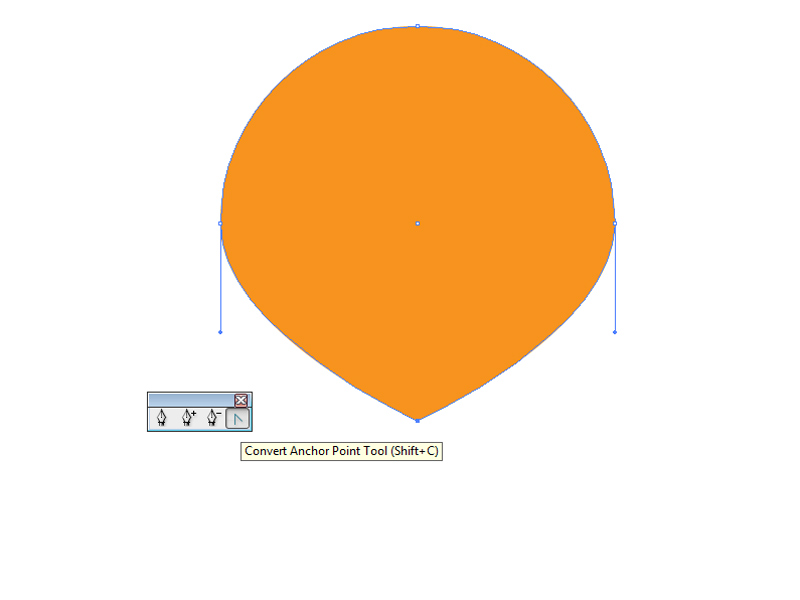
We want to keep the curve though, so keeping the point selected with the convert anchor tool slowly drag the mouse to the left to create a shape like this:

STEP 4
Now with the direct selection tool drag the bottom point downwards to create a balloon shape.

STEP 5
Again with the direct selection tool, now highlight the left hand side point and hit the delete button. You should be left with a shape like the below:

STEP 6
With your shape still selected, from the menu choose Effect>3D>Revolve. I have used the following settings which are the default ones but have a play around with it - it's a fun tool!

STEP 7
Click OK and you should be left with a nice 3d looking balloon

STEP 8
Now to add the numbers. Separately on your artboard type the number 2. I used Cooper Black font in #003DFF at 72pt and I made it 50% transparent - the transparency will let it pick up the shininess of the balloon underneath. Drag and drop the number into your symbols panel:

You should now be presented with this menu:

Name your symbol something obvious and opt for 'graphic'. Leave all the other settings as they were. Your number will now be visible as a symbol in the symbols panel and you can delete it from your artboard.
STEP 9
Select your balloon again and in the 'Appearance' menu double click the 3d revolve fx. This will bring up the same 3d option box as in step 7 but this time we're going to choose the 'map art' option and you will be presented with this:

This box shows the 3d facets of your object. This balloon is a very simple 3d object so it only has 2 surfaces but more complex objects can have many sides which you would choose from the 'surfaces' menu.
We'll just stick with the first surface that opens in the window. Open the symbols drop-down menu and locate your number, click ok and your number symbol will appear like this:

Using the resize box around the symbol make it slightly bigger and move it more towards the centre of the white area which is our balloon surface. You can play around with size and positioning with the Preview box ticked until it looks how you want it.

Click OK twice and you should now have your 3d balloon with the number 2 on the surface:

STEP 10
Using the pen tool freehand draw the gathered balloon opening and ribbon, repeat the process with different coloured balloons and the other numbers and you should have the Happy New Year balloons in the first picture. Of course you can take them into Photoshop now if you want and add some extra sparkle and shadow as I did with these ones for a calender:

I hope this was useful, if anything's not clear please just add a comment. I'll be doing more tutorials throughout the year so please come back again soon.
You explain this so nicely... I might just give illustrator a go! I've never managed to get along with it before.
ReplyDelete